Organizing and managing electrical systems involves low-voltage junction boxes which are critical in connectivity. These multifaceted components ensure safety and proper connection for basic household lighting to elaborate commercial systems. Nonetheless, their installation and usage requires specific practices to ensure safety standards and functionality. This guide will focus on basics like installation steps and optimal usage parameters. These principles will help professionals and DIY enthusiasts alike handle junction boxes with confidence.
What is a Low-Voltage Junction Box?

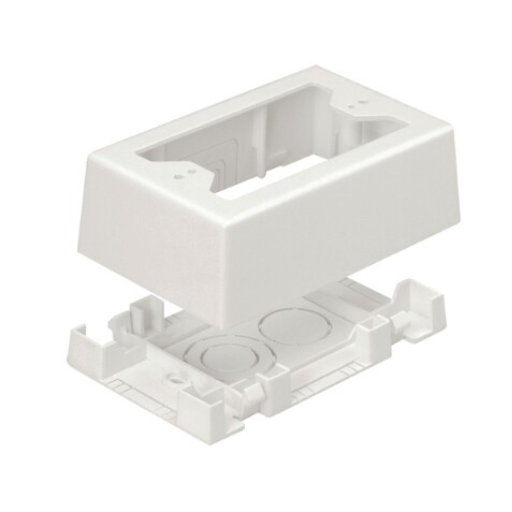
A low-voltage junction box is used for protection from environmental factors like moisture and impact, while also safeguarding the connections of low-voltage wiring systems operating at 50 volts or below, such as security cameras, door-bells and network cables. Besides organization, they also prevent damages that may come from external forces. Moreover, these boxes help protect systems from having exposed, loose wires by maintaining reliability.
Definition and Purpose of a Junction Box
A junction box is critical equipment in an electrical and low-voltage system since it serves to protect wire connections. A focus on regulatory compliance, such as UL (Underwriters Laboratories) listing, meeting safety performance standards and manufacturer guidelines are driving modern designs. Commonly, these enclosures are made from plastic, metal or fiberglass which are prone to impact and environmental moisture, offering reliability against more than just physical wear.
Junction boxes are used in homes, offices and industries for facilitating and simplifying the centralization of wiring systems. Because of their sealed construction, access to dust, dirt, and other contaminants which may affect the quality of the connections is curtailed. In addition, several models come with added features such as preset knockouts and built in mounts which increase ease of use while enhancing versatility for different projects. Moreover, junction boxes are crucial for grounding systems because they have special terminals which protect the system from electric faults and surges increasing overall safety.
Differences Between Low-Voltage and High-Voltage Boxes
|
Key Point |
Low-Voltage Boxes |
High-Voltage Boxes |
|---|---|---|
|
Voltage Range |
Typically under 50V |
Typically 120V or higher |
|
Common Use Cases |
Telecommunication, data, and audio systems |
Electrical power distribution |
|
Material Composition |
Plastic or lightweight materials |
Metal or heavy-duty materials |
|
Code Compliance Requirements |
Less stringent wiring codes |
Strict compliance with NEC/local codes |
|
Fire Risk |
Minimal due to low voltage |
Higher risk, requires extra safety measures |
|
Grounding Requirements |
Limited or no grounding required |
Necessary for safety |
|
Wire Insulation Type |
Thin insulation |
Thick, high-durability insulation |
|
Box Size |
Smaller and more compact |
Larger to accommodate robust components |
|
Cost |
Usually lower cost |
Generally more expensive |
|
Installation Complexity |
Easier and faster to install |
Requires specialized knowledge and tools |
|
Compatibility with Devices |
Low power devices |
High power machinery and systems |
|
Heat Dissipation Requirements |
Minimal |
High, due to potential for overheating |
|
Safety Hazards |
Low risk |
Higher risk, requires safety precautions |
Common Applications for Low-Voltage Junction Boxes
Wherever low-voltage electrical systems are installed, low-voltage Junction Boxes are a key component. These boxes serve the function of safeguarding connections, offering containment for stray wires, and ensuring the orderly functioning of all systems within a low-voltage environment. Some of the applications are listed below:
- Home Automation Systems
- In residential homes, low-voltage junction boxes are extensively incorporated in smart home systems. Examples are sensor connections, smart thermostat integration, lighting control, and home security system interfacing.
- Voltage range typically handled: 12V to 24V DC.
- Audio-Visual Installations
- Often used for wiring control of television sets, speakers, and home theaters.
- Provides organized and neat connections without excess interference
- Telecommunication and Networking Systems
- In the oversight of Ethernet connections, Wi-Fi routers, and telephone line installations, they’re used in the infrastructure.
- Provides structured cabling with controlled growth potential.
- LED Lighting Solutions
- These components are important in the activation of low-voltage LED strips, downlights, and spotlights which are common in task and accent lighting.
- Safeguards efficient energy control systems while providing the highest level of safety.
- Security and Surveillance Systems
- CCTV cameras, motion detectors, and alarms are systematically wired for interconnection as peripherals to the primary control unit.
- Supports installations that are hidden and designed to be difficult to alter or destroy.
- Industrial Automation
- Used to control low-voltage industrial systems that supply and command sensors, HMI (Human-Machine Interface) panels, and actuators.
- Provides protection even in harsh working conditions.
Low voltage junction boxes remain an integral component of contemporary electrical systems because they provide flexibility and secure connections for multiple purposes. Their small size and low safety risk makes them ideal in working conditions where space is confined, and operational reliability paired with protection is essential.
How to Choose the Right Low-Voltage Junction Box?

When selecting the correct low-voltage junction boxes, pay attention to the factors below:
- Application Requirements: Outline the residential, commercial, or industrial purpose of use for the junction box. This, alongside the specific application, determines its size, shape, design, material, and construction features.
- Material Composition: Select a material that efficiently foresees operating conditions for indoor applications. Plastic and other lightweight materials suffice, whereas outdoor applications and harsh conditions require metal and weatherproof enclosures.
- Ingress Protection (IP) Rating: Check that the box possesses given protections from any possible dust particles, moist, or other environmental details as per the IP rating.
- Size and Capacity: Choose a box which caters to the quantity of wires and interconnections and any other additional features the box may have, with surplus room for scalability if necessitated down the line.
- Safety Standards: Identify critical certifications and compliance standards issued for the product to ensure effective performance and risk management.
These considerations allow for operational and safety requirements to be met effectively with the junction box selected.
Factors to Consider When Selecting a Junction Box
As with any electronic device, a junction box requires particular attention while considering its multifunctional features such as working conditions, environmental impacts, as well as safety norms. Some parameters that need consideration in such a junction box include:
- Material Composition
- Metallic vs. Non-Metallic: IP Rated Non-Metallic options Polycarbonate and fiberglass offer lightweight and corrosion resistant solutions adequate for wet and outdoor environments as compared to metallic options such as steel and aluminum which possess higher strength making them suited for industrial applications.
- Environmental Suitability: Use materials designed for shielding from ultraviolet rays, chemicals, moisture, extreme temperatures, assuring resistance under given conditions over time.
- Ingress Protection (IP) Rating
- Definition: IP ratings specify minimum capability of the junction box with regards to protecting entry of solid particles and liquids. For example, dust and strong water jets are permitted for an enclosure with IP66 rating.
- Application Consideration: IP67 and IP68 are crucial for installations which are situated underwater or are submersible.
- Thermal Management
- Heat Resistance: Enduring problematic works with regards venturing spaces, especially with high heat usage. For an enclosure, utilizing features such as vents or heat sinks to aid in heat dissipation is beneficial.
- Ventilation: This deals with the proper circulation of air around enclosed systems and must be sufficent in space to deal with oversized workloads.
- Mounting Options
- Types: Junction boxes can be surface mounted where they are attached to the exterior of a flat vertical structure, pole mounted, or flush mounted where they are embedded into the mounting surface.
- Ease of Installation: Survey the supplied mounting hardware and check for pre-punched knockouts.
- Cable Entry and Connectivity
- Knockout Configurations: Ensure that the available knockout sizes are sufficient for the required cable diameters.
- Grommets and Cable Glands: Supporting components, such as grommets, should retain the necessary tightness to preserve the protection level of the box.
- Environmental Conditions
- Corrosive Environments: For coastal and industrial applications, think about corrosion protective finishes.
- Vibration and Impact Resistance: Use enclosures with ratings for mechanical strength, like IK ratings where IK10 is the highest for impact resistance.
Evaluating all the details systematically ensures that all aspects in the selection of junction boxes aligns with set technical specifications, operational requirements, compliance, and ensures both efficiency and reliability through its designed life cycle.
Understanding Box Sizes: 1 Gang vs. Multiple Gang
The terms “1 gang” and “multiple gang” classify electrical boxes according to their size and capacity, which defines their use for particular installations. A 1 gang box is meant to hold a single device, which can be a light switch or a one-socket outlet. The boxes are small, therefore, they are suitable for compact spaces with restrictive room and minimal configuration requirements. Conversely, there exist multiple gang boxes, like 2 gang or 3 gang, that are meant to hold several devices in a single enclosure.
These types of multiple gang boxes are common in places where there are higher usages, enabling the placement of numerous switches, outlets, or a combination of both at a single site. As with any other kind of electrical installation, dimension restrictions pose additional challenges, including greater height and width, as well as cable management to comply with the National Electrical Code (NEC) Guidelines. Furthermore, the type of material, whether PVC or metal, will dictate the feasibility of the electrical box mating with the wall type, thus, proper selection must be made to guarantee seamless integration. Knowing the requirements will help the user choose the appropriate box for the system in question.
Material Options: Steel vs. Plastic Junction Boxes
|
Key Point |
Steel Junction Boxes |
Plastic Junction Boxes |
|---|---|---|
|
Material Composition |
Made of galvanized or stainless steel |
Made of PVC or thermoplastics |
|
Durability |
High durability; resists impact and corrosion |
Moderate durability; prone to cracking under stress |
|
Conductivity |
Conductive; requires proper grounding |
Non-conductive; no grounding needed |
|
Cost |
Generally more expensive |
Typically more affordable |
|
Weight |
Heavier than plastic alternatives |
Lightweight and easy to handle |
|
Fire Resistance |
Superior fire resistance |
Moderate fire resistance |
|
Installation Environment |
Suitable for industrial and outdoor environments |
Best for residential and indoor use |
|
Compatibility |
Compatible with conduit and metal-clad wiring |
Suitable for non-metallic wiring systems |
|
Resistance to Chemicals |
High resistance to many chemicals |
May degrade with certain chemical exposures |
|
Aesthetic Appeal |
Industrial appearance |
Blend better with standard residential interiors |
|
Ease of Modification |
Harder to drill and customize |
Easier to cut and modify |
|
Weatherproof Options |
Widely available with weatherproof options |
Limited weatherproof options |
|
Recyclability |
Fully recyclable at end of life |
Limited recyclability |
Installation Guide for Low-Voltage Junction Boxes
- Preparation
- Confirm lack of obstruction and access pathways for ongoing maintenance prior to completing tasks.
- Confirm adhering to local building and electrical guidelines.
- Mark and Cut the Installation Area
- Trace around the box outline using the box cover so you can mark on the wall where you wish to mount it.
- With a drywall saw or similar tool, carefully cut out the area specified for the opening of the box to ensure alignment.
- Secure the Junction Box
- Now the junction box can be inserted in the opening that was prepared for it.
- Use the screws or mounting tabs to secure it, making sure that the junction box is flush with the wall.
- Wire Connections
- Carefully insert low-voltage cables into their respective slots. Avoid overtightening clamps as this may damage the wires.
- In accordance with the system wiring diagram, connect the cables with wire connectors or suitable terminals.
- Final Inspection and Cover Installation
- Check for accuracy and tighten all screws for proper alignment. No wires should be exposed after checking the concealed cabling.
- Fix the cover plate onto the junction box ensuring it is seamless and snug.
Following these steps will ensure the safe and efficient installation of the junction box. Always consult the product manual for any specific recommendations from the manufacturers.
Tools Needed for Installation
The appropriate tools and materials for a junction box include:
- Screwdrivers (Flathead and Phillips)
Completes tasks involving screws on terminals, mounting brackets, or the cover plate.
- Wire Strippers and Cutters
Essential for trimming and cutting wires to length for removal of the insulation.
- Voltage Tester or Multimeter
Confirms that electric current is absent before starting work to the device and assists in installer safety.
- Drill and Drill Bits
Provides aid for making mounting holes or affixing the box to fixed surfaces when such holes do not exist beforehand.
- Non-Contact Voltage Detector
This tool that adds an extra layer of verification on top of quickly checking the absence of current in the wiring provides extra backup.
- Fish Tape or Cable Puller
Wires that are needed to be placed through conduits or tight areas can be done with less effort and greater efficiency.
- Level
Professional appearance and function require the junction box to be placed absolutely aligned and level, including the aesthetics.
- Protective Equipment
Wearing safety goggles and insulated gloves are examples of this gear which are critical during work installation.
The tools listed above aid compliance with the safety measures required and assist with the installation process.The tools must be in proper working order prior to commencing to the task to ensure an efficient installation process.
Common Mistakes to Avoid During Installation
- Neglecting to Verify Electrical Connections
One mistake made during installation is not systematically checking all electrical connections. Their operational, short-circuiting, or in the worst case, electrical fire potential, can stem from improper connections. Remember to cross-check with the manufacturer’s wiring schematic to guarantee all connections are secure.
- Using Incorrect Tools or Materials
Selecting a tool or material can significantly diminish the installation’s safety or quality. For example, using undersized fasteners or screws could lead to catastrophic failures when a surge of load is applied. Checking scrutiny by all visitors to formulate required standard specifications is essential when engaging in installation measure.
- Improper Grounding Techniques
Conducting grounds improperly skips major electric shock hazards that can damage electronics. Best practice incorporates ground checks ensuring all parameters set to measure resistance are satisfied.
- Failing to Adhere to Manufacturer Specifications
Absence of the installation document provided by the manufacturer is the reason many installers make this common blunder. These are crucial documents and must be treated as such as deviating could result in a cancellation of warranty on the equipment.
- Overlooking Environmental Factors
As with many other parameters, temperature, moisture, and exposure to certain corrosive elements, in most cases, are not taken into account during the installation process. For example, in an environment that is moist, lacking corrosion-resistant materials can lead to system deterioration or failure. Consideration of the environment is fundamental, especially when assessing areas for prolonged dependability.
Addressing these installation issues directly results in reduced fault prevalence and enhanced overall system performance along with a mitigated risk of compromise to safety or reliability during installation.
What are the Best Practices for Using Low-Voltage Junction Boxes?

- Choose the Appropriate Box Type
To ensure compliance with low-voltage systems as well as for safety standards, choose a junction box meant specifically for those applications.
- Ensure Proper Sizing
Select a box that will comfortably accommodate all the wires and connections to prevent congestion which may result in overheating or make maintenance difficult.
- Secure Connections
All wire links must be firmly attached using approved connectors with electrical continuity in mind; otherwise, unintentional disconnects may occur.
- Avoid Overloading the Box
Do not exceed the allowable circuits that can be connected within the junction box in order to stay compliant and safe from electrical risks.
- Install in Accessible Locations
Place the box in an accessible spot so it can be reached easily for inspections, maintenance, or any changes while complying with local electrical codes.
- Label All Connections
For easier troubleshooting, future system updates, and maintenance, all cables and internal connections should be meticulously described.
These practices will help guarantee operational safety and compliance with regulations pertaining to low-voltage junction boxes.
Proper Wiring Techniques for Low-Voltage Systems
Forging signs of excellence in performance and safety within low-voltage systems greatly depends on proper wiring techniques. Ensure that proper wiring gauges are selected with regard to voltage, current, and distance for specific use-case scenarios. Using under-equipped wires may lead to excessive overshoot in voltage, overheating, and system failure. For low-voltage systems, alternative materials to copper are far less desirable due to their low conductivity and reliability.
Be sure all connections are crimped or compression-connected for direct application. Avoid using twist-on wire connectors unless explicitly authorized for low-voltage use, as they may lose mechanical stability over time. In addition, ensure uniform color codes for wires throughout the system to aid in circuit identification and troubleshooting.
Routing of cables should ensure low-voltage wirings are distanced from high-voltage cables and other noisy equipment in order to minimize electromagnetic interferences (EMI). Use of shielded cables can also be utilized in areas with greater risk of interferences. Emphasis should also be placed on wire bundling as damaging effects can occur on protruding wires due to unsupported mechanical stresses.
As always, double-check that the wiring is correct and complete with the multimeter or voltage tester before powering up the system. Carrying out preliminary checks can pinpoint issues while protecting the system, its operators, and structure from possible safety violations and problematic workflow in the future. Adopting these measures allows for safe and high-standard performance while enhancing the operational efficiency and lifespan of low-voltage systems and installations.
Ensuring Safety and Compliance with Electrical Standards
It is based on the foundational principle of sound engineering judgment alongside compliance with applicable laws and regulations for technical and commercial practice, centered on safety and compliance with set electrical standards. Tracking changes in the National Electrical Code (NEC) or its equivalents in other countries is crucial as these documents undergo changes and updates with the emerging safety concerns and advanced technologies. Periodic risk assessment is a useful technique to identify and address possible threats to residential and industrial buildings before they turn to major breakdowns.
Certified equipment and products are also vital for circuit breakers, surge protectors, and grounding systems that meets UL, IEC, or ISO standards to be used. Also ensuring that some basic conductors’ dimensions and rated insulation values are adhered to reduces the chances of short circuits and overloads.
Regular training sessions for staff, such as electricians and maintenance crews, guarantee adherence to operational practices within the frameworks of current safety regulations. Moreover, modern technologies such as infrared thermography and power quality analyzers, which inspect thermal systems and identify irregularities respectively, provide valuable information regarding the performance of the systems. Stringent compliance to these methods ensures that electrical systems are working safely and efficiently while observing legal standards.
How to Connect Wires in a Low-Voltage Junction Box?

Connecting wires in a low-voltage junction box requires the following procedures:
- Turn Off Power: Make sure that all power and electricity within the junction box is disabled.
- Prepare the Wires: Using a wire stripper, strip around 3/4 inches of insulation from the end of each wire. Do not cut the conductor strands.
- Match Wire Types: Positively or negatively charged wires will be separated and grouped accordingly. They will usually be color coded within low-voltage systems to make the process easier.
- Connect the Wires: Matching wires will be sealed using wire nuts or connectors; ensuring that there are no conductors visible from the seal connecting multiple wires. Each group’s exposed wire ends will be placed into a connector and twisted to a secure state.
- Organize the Wires: The exposed ends from the wires should be bent into the junction box, while also ensuring the wires should not be pulled or pinched. This reduces the chances of shorts and damage.
- Secure the Cover: Have all the connections in place, then place the junction box cover and secure it to make sure it stays in place.
- Test the Connection: After all steps above have been performed, turn on the system and check whether everything functions properly.
Following these steps will guarantee a safe and dependable connection within a low voltage junction box. Always refer to local electrical codes and rules to ensure compliance.
Types of Connectors and Splices to Use
Choosing the right splices and connectors for low-voltage junctions is crucial for maintaining safety, as well as system performance and reliability. There are several connectors and splices designed specifically for low-voltage use:
- Twist-On Wire Connectors
Twist on wire connectors or wire nuts as they are commonly known, are usually used to connect two or more wires in both residential and commercial low-voltage systems. Wire nuts secure connection by joining the wires and twisting the wires together inside an insulating cap which prevents disconnection or exposure to open circuits.
- Push-In Connectors
These types of connectors are user friendly as well as time saving. In this connector, wires are pushed into the assigned holes/sockets and an internal device secures them firmly in place. Push-in connectors are praised for ease and simplicity which ultimately saves time.
- Crimp Connectors and Splices
Using crimp tools creates crimp connectors which joins wires into a solid mechanical bond. Heat-shrink and crimp splice connectors are suitable for splicing since they also insulate and protect from moisture and other environmental conditions.
- Insulation Displacement Connectors (IDCs)
IDCs permit wire connections without stripping the insulation beforehand. These connectors are especially practical for low-voltage or telecommunication uses since they slice through the insulation when they latch onto the wire.
- Soldered Splice Connections
In modern installations, soldering wires together may not be as common, but it does offer a strong and permanent connection. This technique is often used in systems which are specially designed to be very stable and enduring, where additional heat shrink tubing is used for insulation.
- Gel-Filled Waterproof Connectors
When it comes to outdoor or exposed environments, gel-filled waterproof connectors are critical for low-voltage systems in humid or water prone areas.
Each type of splice or connector have their different strengths and unique applications where they are most useful. Best practice is to always check against the wire gauge and voltage to ensure it is suitable before installation. Otherwise, system requirements, environmental conditions, compliance requirements with local legislation on electrical work determine which option is most suitable.
Understanding Screw Terminal Connections
Screw terminal connections are perhaps the most common method used to secure electrical wires across various applications, spanning from home outlets to sophisticated industrial machinery. These types of connectors lock a wire under a screw which provides both mechanical and electrical connection. They can accept various wire sizes which is beneficial in different circuit setups.
A notable benefit of screw terminal connections is their steadfastness when installed correctly. For instance, the grip provided post-screw tightening will prevent the connection from being too loose which could endanger safety or create electrical failure. On the contrary, overly aggressive tightening can result in strained wire strands, damaged connectors, loose connections, and a reduced strength solder joint over time.
Using a torque screwdriver while implementing screw terminals is critical to meeting the torque specifications provided by the manufacturer. This enables consistency and prevents both slack and excess tightness, which affects performance. Moreover, for long-term installations, note that galvanic corrosion will occur if the terminal is made of a compliant, brass, or copper alloy that does not match the wire conductor.
Screw terminals are found as connection points within the distribution boards, control panels, and terminal blocks. To prevent connection loosening, especially in vibration or thermal-shift-prone environments, frequent checking helps with performance and safety.
Using Low-Voltage Brackets and Mounting Options
Outlets and switches, as well as communication panels and other devices, need to be secured by low-voltage brackets which are important in infrastructure wiring. They also ensure the arrangement of low voltage cabling systems meets safety standards while improving the order of installation layouts. Together. Low-voltage brackets come in plastic which reduce electronic impact while serving across variable conditions, making it non-conductive.
The range of architectural and structural requirements is addressed by both surface-mount and flush-mount designs for low voltage brackets. Trim or flush mount brackets are mainly applied for new construction where walls are open and comply with modern aesthetic standards. Ease of access also allows for surface-mount options in retrofits where walls cannot be cut into, serving as a flexible and efficient solution.
Brackets can now be designed with adjustable depth settings to modify for differing wall thicknesses and configurations. Also, precision adjustable clips and screwless installations have become widespread, reducing manual labor while upholding accuracy. Commercial installations often use high-density cabling systems which require multi-gang configurations that can manage several connections within a small footprint. With low voltage mounting, clutter is minimized while functionality and efficiency are optimized, contributing towards the life span of the telecommunications infrastructure.
What are the Limitations of Low-Voltage Junction Boxes?

Though having a defined purpose, low-voltage junction boxes have some important drawbacks. They are not useful for containing high-voltage electrical interconnections or heavy-duty wires since they do not provide adequate mechanical support. Furthermore, they have very low fire-resistance capabilities, which, in some placements, may be a safety hazard. One more limitation these enclosures have is reduced physical volume, which may limit the number and order of cables within. Lastly, due to their design and construction, low-voltage junction boxes may not work with all mounting surfaces. To achieve the desired efficiency and reliability, these limitations need to be addressed during the system design.
Common Issues and Troubleshooting Tips
- Overheating of Junction Box
Load and poor connections are two frequent causes of overheating. Make certain that all of the connections are properly made and that the total amp draw is within the rated limits of the junction box. Routine checks and the application of thermal imaging cameras can help mitigate the risk of undetected device failure by identifying possible failure points.
- Ingress of Moisture or Dust
The functional efficiency of a low voltage junction box can be affected by environmental factors, particularly in outdoor or industrial applications. To reduce the impact of such factors, make sure the junction box has the required IP rating for the area of deployment. Effectively seal all ingress points besides ensuring proper IP rating and perform regular inspections or maintenance checks to guarantee sustained safeguarding.
- Loose or Corroded Connections
For some time, operational vibrations or environmental changes may lead to loosening of the connections within the junction box, leading to recurring issues with functionality and power. Use terminals or connectors which have proven reliability in the ecosystem and are tough enough to withstand the conditions. Moreover, the application of anti-corrosion agents could aid these systems by providing an extended service life for the connections.
- Insufficient Cable Management
Excessive material concentration in a junction box may hamper heat dissipation enhancement or make maintenance and servicing more challenging. Curbing this problem is achievable by incorporating a junction box with sufficient dimensions, alongside effective routing through wire organizers or cable ties.
- Incorrect Installation on Non-Compatible Surfaces
Installing a junction box on a mounting surface of low stability or inappropriate type could lead to damage to the device due to offsetting as well as low operational efficiency. Verify the sturdiness of the mounting area, and comply with the manufacturer’s installation instructions to obtain an accurate and robust installation.
Following the appropriate procedures and addressing these issues proactively can help users reduce the maintenance expenses, downtime, and repair costs associated with servicing their low-voltage junction boxes.
Water Resistance and Outdoor Usage Considerations
IP-rated outdoor junction boxes should be handled with the same level of care as polycarbonate and stainless steel due to their capability in withstanding elements such as high impact, corrosion, water, and also providing safety for electronic components by preventing dust buildup. During installation of low voltage junction boxes, special attention should be given to areas prone microwaters to maintain maximum safety while also preventing corrosion of the device. IP65 is the minimum rating for devices which provide water and dust protection while stainless and polycarbonate materials provide a durable shield against the elements.
The junction boxes are also subjected to various hot and cold temperatures, UV light, and relative humidity. For example, rough weather externally exposed boxes might need to be reinforced using waterproofing gaskets or silicone seals. Also, condensation that may compromise the internally placed components can be controlled using weep holes set below the water level.
Adhering to safety standards, such as performing routine checks and using weatherproof cable glands, guarantees that outdoor installations are maintained and kept reliable in changing surroundings. Correct implementation minimizes the chance of electrical failure and contributes to safe operational standards, improving the overall lifespan of the equipment.
Reference Sources
-
Implementation and Experimental Verification of Smart Junction Box for Low-Voltage Automotive Electronics in Electric Vehicles: This study focuses on designing and implementing a smart junction box (SJB) optimized for low-voltage automotive electronics in electric vehicles. The SJB integrates intelligent power switches (IPS) and uses pulse-width modulation (PWM) to stabilize power supply and extend the lifespan of headlights.
-
Low Voltage Distribution Box Monitoring – New Way to Monitor Power in Industry: This paper discusses the health monitoring of low voltage distribution boxes in industrial settings. It highlights the need for monitoring parameters like voltage, current, and temperature to prevent issues such as sparking, insulation damage, and overloading.
-
The Essence of the Little Box Challenge – Part A: Key Design Challenges & Solutions: This paper explores the design challenges and solutions for creating compact and efficient power electronic systems, specifically focusing on a 2 kVA inverter.
Frequently Asked Questions (FAQs)
Q: What is a gang low-voltage junction box?
A: A gang low-voltage junction box is a type of electrical box designed to house low-voltage cables and connections. It is typically used for organizing and protecting wiring for fixtures such as lighting, networks, and control systems.
Q: How do I install a low-voltage box in a wall?
A: To install a low-voltage box in a wall, first ensure you have the right tools and materials. Cut an opening in the wall for the box, secure it using screws or clamps, and then connect the low-voltage cables according to your project’s specifications.
Q: What types of cables can be used with a low-voltage box?
A: Low-voltage boxes are suitable for various types of cables, including those used for lighting, audio, and network applications. Ensure the gauge and type of cable you choose are compatible with the specific low-voltage box you are using.
Q: Are there mini low-voltage junction boxes available?
A: Yes, mini low-voltage junction boxes are available and are often used in smaller installations where space is limited. They are designed to be easy to use while still providing the necessary protection for low-voltage connections.
Q: What is the difference between surface mount and in-wall low-voltage boxes?
A: Surface-mount low-voltage boxes are installed on the surface of walls, allowing for easy access and installation, while in-wall boxes are recessed into the wall for a more integrated look. The choice depends on your project’s requirements and aesthetic preferences.
Q: Can I use a low-voltage box for underground wiring?
A: Yes, there are specific low-voltage boxes designed for underground use that are water resistant and durable enough to withstand environmental conditions. Ensure that you select the appropriate box that meets these criteria for your underground project.
Q: What is the warranty period for low-voltage junction boxes?
A: The warranty period for low-voltage junction boxes varies by manufacturer but typically ranges from one year to a lifetime warranty, depending on the product’s quality and intended use. Always check the product specifications for details.
Q: How do I ensure my low-voltage installation is compliant with electrical codes?
A: To ensure compliance, follow the local electrical codes and regulations regarding low-voltage installations. It may also be helpful to consult with a licensed electrician or refer to the manufacturer’s instructions for the specific low-voltage box and cables you are using.
Q: What features should I look for in a low-voltage box?
A: When selecting a low-voltage box, look for features such as water resistance, ease of use, compatibility with your project’s cables, and whether it is designed for specific applications like gang low-voltage installations or surface-mount options.
Q: Can low-voltage junction boxes support control systems for smart lighting?
A: Yes, low-voltage junction boxes can support control systems for smart lighting. Ensure the box is appropriately sized and can accommodate the necessary cables and connections for your setup.